How to netboot and install NetBSD/sparc
Preface
I've got a Sun SparcStation IPX which I want to install NetBSD on. This old machine has neither a
cdrom nor an USB connector (USB was invented several years after these
machines hit the market). You could hook up an external SCSI cdrom or a tape
drive, but I have neither of them. Thus, netbooting the installer remains the
only choice. The steps described below work out for NetBSD 8.0, 7.1.1, 6.0.1,
5.2, 4.0.1, and 3.1.1. My IPX has quite an old
OpenBootProm or OBP, the
"bios" of Sparc machines. OBP version 2.4 or older neither boots NetBSD 4.0.1,
5.2, 6.0.1, 7.1.1, nor 8.0 from disk due to an incompatibility with the second
stage bootloader. In such case, you have to use the second stage bootloader
from NetBSD 3.1.1. Netbooting these releases works fine, though..
The installer of NetBSD (sysinst) has an option to update an already installed
system. This howto describes the steps which are neccessary to netboot the
installer. Following these steps you should also be able to update your system.
Requirements
- Either download NetBSD-8.0-sparc.iso
or fetch all files separately:
- Download base.tgz from NetBSD 3.1.1
- A network bootserver running
- a rarp server
- a tftp server
- a dhcp server
- a nfs server
- a kernel that supports nfs server.
At least the rarp and tftp servers must run on the same machine. The dhcp as
well as the nfs server may each run on a different machine. For simplicity I
installed everything on a single Gentoo Linux machine:
- rarpd is part of net-misc/iputils which might be already installed if you
can execute tools like ping or ping6
- tftpd is also part of net-misc/iputils but requires (x)inetd. Therefore, I
installed net-ftp/atftpd
- As dhcpd I used that one from ISC - net-misc/dhcp
- nfs requires a bunch of daemons. Just install net-fs/nfs-utils.
- a free ip address for your Sparc box
- a functioning network
- your Sparc box, of course. Note that older Sparcs have a battery backed
NVRAM. If that battery is dead, then the machine has no hostid and no mac
address and won't boot. You can replace the original Mostek NVRAM with one
from STM. Or you might attach a new battery. In any
case, read the Sun
NVRAM/hostid FAQ.
Screenshots
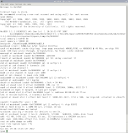
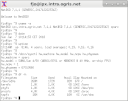
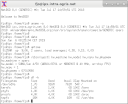
Here's my IPX running NetBSD 3.1.1, 7.1.1 and 8.0:


I recently replaced the old 426 MB SCSI harddrive (Seagate ST1480N) by a
whopping 2 GB drive (ST32151N). Thus, I had enough disk space to install all
sets.
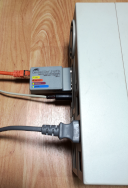
You need a
MAU
transceiver in order to connect an IPX to a 10 MBit ethernet network. Serial
console requires a custom built mini DIN 8 port to DB9 connector, which
nowadays might go to a USB-to-serial dongle:

The pinouts for the serial console are documented in
The Sun Hardware Reference Part 2
under the Miscellaneous Pinouts section.
Steps
- If you downloaded the iso, mount it:
$ sudo mount -t iso9660 -o ro,loop /path/to/NetBSD-8.0-sparc.iso /mnt
- Create a directory that will serve as tftp area:
$ sudo mkdir /tftpboot
- Copy boot.net to /tftpboot/:
$ sudo cp -iv /mnt/sparc/installation/netboot/boot.net /tftpboot/
- Check whether your Sparc box has a SUN4M or a SUN4C based architecture.
For this, you might visit http://www.netbsd.org/ports/sparc/.
For instance, an IPX is a SUN4C while a JavaStation is a SUN4M
- Calculate the hexadecimal representation of your Sun's ip address, e.g. my
IPX uses 192.168.0.22 which is C0A80016 in hex. You can use this command:
printf %02X%02X%02X%02X 192 168 0 22
- In /tftpboot, create a symlink like this:
$ sudo ln -s boot.net C0A80016.SUN4C
Of course you should replace that hex ip address and architecture to match
yours.
- Put you Sparc's mac address along with its IP address to /etc/ethers:
08:00:20:c0:ff:ee 192.168.0.22
- In /etc/conf.d/rarpd, set the interface rarpd should listen on, and let
rarpd reply even if there's no boot image:
RARPD_IFACE="eth0"
RARPD_OPTS="-e -v -b /tftpboot"
- Start rarpd:
$ sudo rc-service rarpd start
- Start atftpd:
$ sudo rc-service atftp start
- Edit /etc/dhcp/dhcpd.conf. At the bare minimum it should contain something
like this:
subnet 192.168.0.0 netmask 255.255.255.0 {
  range 192.168.0.100 192.168.0.110;
}
host ipx {
  hardware ethernet 08:00:20:C0:FF:EE;
  fixed-address 192.168.0.22;
  next-server 192.168.0.10;
  option root-path "/data/netbsd";
}
- Start dhcpd:
$ sudo rc-service dhcpd start
- Create the directory that will serve as the netbooted kernel's root
directory:
$ mkdir /data/netbsd
- Copy netbsd-GENERIC.gz (the NetBSD kernel) to that directory:
$ cp /mnt/sparc/binary/kernel/netbsd-GENERIC.gz /data/netbsd/
- Inside the root directory, copy netbsd-GENERIC.gz to netbsd so
that the network bootloader will pick up the kernel:
$ cp -iv /data/netbsd/netbsd-GENERIC.gz /data/netbsd/netbsd
- Extract the root filesystem (the --numeric-owner switch is
important!):
$ tar -C /data/netbsd --numeric-owner -xvzpSf /mnt/sparc/installation/netboot/rootfs.tgz
- Make the install sets available underneath the root directory:
$ cp -aiv /mnt/sparc/binary/sets /data/netbsd/
- Export the root directory with NFS. Add to /etc/exports:
/data/netbsd 192.168.0.22(rw,no_root_squash,no_subtree_check)
- Make sure NFS version 2 and UDP transport are enabled in /etc/nfs.conf:
[nfsd]
UDP=on
vers2=on
vers3=on
- Optionally, make nfsd log to syslog by extending the variable
OPTS_RPC_NFSD in /etc/conf.d/nfs:
OPTS_RPC_NFSD="-s -u 8"
- Start NFS:
$ sudo rc-service nfs start
- Extract the second stage bootloader from NetBSD 3.1.1:
$ tar -C /tmp -xzf /path/to/base.tgz ./usr/mdec/boot.388000
- Connect a keyboard and a monitor to your Sparc box, or use a serial
connection
- After powering on, press Stop+A (Ctrl+A+F in minicom) to escape to the OBP
prompt
- At the prompt, type boot net. For very old OBPs, you might have to
switch to the (N)ew command mode
- When the kernel and sysinst have been loaded after several minutes (might
take up to 30 minutes on very old machines), you can install NetBSD to
disk
- During the installation, choose Local directory as source media to
install from. As base directory enter /, whereas the set directory
should be /sets
- After the installation, you have to install the second stage loader from
NetBSD 3.1.1 if your OBP is on an old version. Thus, before rebooting the
machine, select Utility menu, and then Run /bin/sh
- Alternatively, reboot your Sun, let it try to load NetBSD, and if it fails
with a Data Access Exception, your OBP is too old. In such case, you
should be presented the OBP prompt again. If not, once again press Stop+A or
Ctrl+A+F to enter the OBP. Then, type boot net to boot the installation
system once again, but don't select (I)nstall/Upgrade. Instead, start a
(S)hell
- Mount the root disk you just installed NetBSD to, and chroot into it:
# mount /dev/sd0a /targetroot
# chroot /targetroot
- Rename the current second stage loader (/usr/mdec/boot is hardlinked to
/usr/mdec/boot.388000):
# cd /usr/mdec
# mv boot boot.80
# mv boot.388000 boot.388000.80
- Grap the second stage loader from NetBSD 3.1.1 you extracted on your
bootserver:
# scp user@bootserver:/tmp/usr/mdec/boot.388000 /usr/mdec/
# ln /usr/mdec/boot.388000 /usr/mdec/boot
- Reinstall the bootloader chain:
# cp -v /usr/mdec/boot /
# installboot -v /dev/rsd0c /usr/mdec/bootxx /boot
- Leave the chroot environment, unmount the local disk, and reboot NetBSD
8.0 from disk:
# exit
# umount /targetroot
# reboot
Generating the SSH host keys during first boot might take a long time (up
to 2 hours) on such old machines, though.


